
Starting Up |
|
Insert a charged battery and power on the G2 and R5. Observe the lights begin to blink after a few seconds.
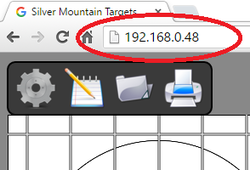
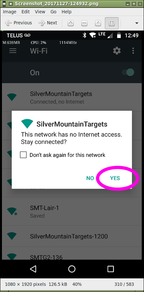
Connect with your Wifi device to the access point SilverMountainTargets. With your web browser, navigate to “192.168.0.XX” where XX is the number written on the G2 battery cap. With some cellphones you may need to confirm you wish to use SilverMountainTargets wifi |
|
Software Configuration |
Enter admin mode by clicking the "GEARWHEEL" button; the password is "becareful".
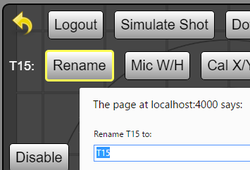
Click the ADMIN-TARGETFRAME (top-left) button. Select your target frame and press the "Rename" button to give it a meaningful name. Click the yellow "GO BACK" arrow. Click the ADMIN-TARGETFACE button and import target face definition files that you plan to use. These are available from RESOURCES->Target Faces. |
|
Target Frame Setup |
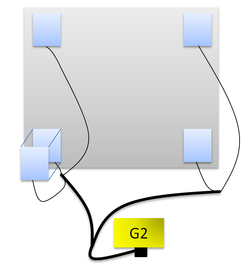
Attach the mounting plates to the four rectangular corners of your target frame with screws.
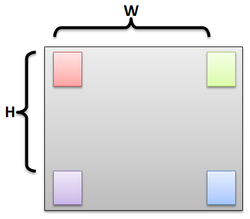
Measure and record the edge-to-edge distance between the mounting plates in width and height as shown in the diagram. In the ADMIN-TARGEFRAME view, enter these measurements in millimeters using the "Mic W/H" button. |
|
Daily Range Setup |
Attach the sensors to the mounting plates and connect the cabling as shown in the diagram.
Connect and place the antenna with line of sight to the firing point, and turn on the G2. At the firing point, turn on the R5 and point it towards the target. Connect to the software, and as admin, select the target face (distance) you will be shooting at. |
|
Calibration |
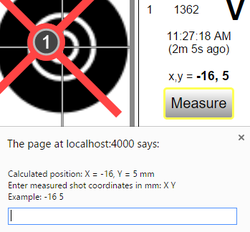
Fire one shot near the center of the target (anywhere in 10-ring is fine).
Measure the bullet hole's position on the paper:
Click the "MEASURE" button and enter these measurements. The target is now calibrated. |
|
Shooting |
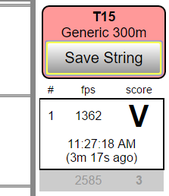
All shots fired on target will be listed in the current string. The most recent, or selected shot is identified with a red X.
Click "Save String" to save these shots permanently and clear the display. |
|
Reviewing Shots |
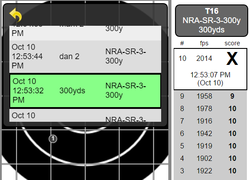
Open the string review panel and select a previously saved string from the list. Click each shot in the list to identify them individually.
|
|
